Nodes serve as organizational units to categorize assets. After the assets land in the upload basket, you can assign them to different nodes and make them available to other users in the system.
In order to make assets available to the whole CELUM Content system and all other users, you need to release them from the upload basket into the asset list.
Prerequisites for releasing
You can release assets only to permission-defining nodes. Additionally, the asset metadata must be valid:
To release the assets to a node with validation level "strict", an asset type must be set and required fields must be filled.
To release the assets to a node with validation level "tolerant", asset type and required fields are optional.
You can release them either in one step or in two steps:
One-step releasing: If you only want to assign the assets to a single permission-defining node at the start, you can activate the "Release on dragging" option in the upload basket's menu bar. Then drag the assets onto a node and they will be automatically released (as long as they have valid metadata).
Two-step releasing: If you want to assign the assets to different nodes in different main view tabs before releasing them to a permission-defining node, deactivate the "Release on dragging" option. Then, assign the assets to all target nodes (including the permission-defining node) and click the "Release" action in the upload basket's menu bar.
Once an asset is released to a node, you can further spread it around the system.
Drag and drop an asset with your mouse to move it from one node to another within the same main view tab.
Press the Alt key on your keyboard and drag an asset at the same time to add it to another node within the same main view tab. The asset also stays assigned to the node it was originally in.
If the Linking Feature is enabled for your CELUM Content server, and if the target node can be node-referencing fields values (such as tags), it will automatically be added to the assets' metadata.
Assets don't have to stay only in nodes of the same node type (main view tab). You have multiple ways to add or move them to nodes of other node types.
Open the dock and switch to the "Clipboard" section of the dock.
Drag and drop assets from the asset list to the clipboard.
Switch the main view to a different node type (main view tab).
Drag and drop the assets from the clipboard to the target node(s).
After you have added the assets to all the nodes you want, you can remove them from the clipboard via the "Remove" action in the clipboard's menu bar or the selected asset's context menu.
Select assets in the asset list and open the context menu.
Click the "Add to Nodes" action. A dialog opens.
The dialog has a three-column layout:
The left column lists all available node types. Click on a node type name to select it.
The middle column lists all nodes of the selected node type which you are allowed to add assets to. Click on a node name to add the assets to it.
The right column lists all nodes which the assets will be assigned to.
Click "Finish" to confirm the dialog and add the assets to the selected nodes.
If the Linking Feature is enabled for your CELUM Content server, and if the chosen nodes can be node-referencing fields values (such as tags), they will automatically be added to the assets' metadata.
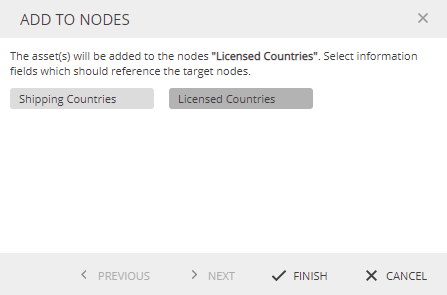
If the target node can be referenced in multiple fields for
the current asset, a dialog appears where you can select which
fields should be updated:
The CELUM Content Linking Feature enables you to add assets to nodes that are also values in node-referencing fields for the assets.
Before adding an asset via metadata editing, the asset has to have an asset type assigned and mandatory metadata set. Additionally, the Linking feature needs to be enabled for your CELUM Content server.
To add assets to nodes during metadata editing:
Edit selected assets' metadata. You can edit metadata for a single or multiple assets.
Navigate to the node-referencing fields and select one or more values (which also exist as nodes in the system).
Save the changes in the assets' metadata.
The values will be added to the metadata fields and the assets will be added to the respective nodes.
It depends on your CELUM Content server's configuration whether all or only specific node-referencing fields will trigger automatic adding to nodes.
If you change the asset type, the node-referencing fields may change. If this is the case, the added metadata will be lost and the assets removed from the respective nodes.
Select an asset in the asset list and open the context menu.
Click the "Remove Asset from <Node type>" action.
Click "OK" in the confirmation dialog.
The asset is removed from the selected node.
If the selected asset is only assigned to the currently selected node or only one (currently selected) permission-defining node, then the option to remove the node is not available. However, you can still completely delete the asset from the system.
Automatic removal via Linking Feature
If the Linking Feature is enabled for your CELUM Content server and if the nodes from which the selected assets were removed were also node-referencing fields values for the current assets (such as tags), they will automatically be removed from the assets' metadata.
Equally, you can automatically remove assets from nodes while editing the asset metadata. Simply edit a node-referencing information field on the asset and remove some values. The asset will subsequently be removed from the respective dereferenced nodes.
In order to keep track of all the nodes that your assets are assigned to, you can use the "Go to Node" action in a selected asset's context menu. It opens a dialog which lists direct links to all nodes that the asset is assigned to, organized by their node type.
Click on a node's path in order to navigate to that node in the main view.
The most likely cause for this is that you do not have the local, role-based "Add Assets" or "Move Assets" permissions on the node in question. You need these permissions in order to be able to add or move assets to the node. Not having these permissions does not preclude you from seeing and navigating to the node in the navigation tree, so you can see it but not add assets to it.