
You can view and manage branded login if you are organisation owner or administrator.
A branded login shows your organisation’s logo, colours, and other brand elements on the login and registration screens. It helps your partners, agencies, and customers recognize your brand and ensures a consistent and professional look across all access points.
To use branded login, contact CELUM and then you can create it in your organisation. Once configured, the branded design appears on all login-related screens when the tenant ID is included in the URL
Exceptions:
The CELUM Cloud Account URL does not have a tenant ID, so it always displays the default CELUM design.
Protected Portals with a custom slug do not contain the tenant ID in the URL, but the branded login will appear if it has been configured for your organisation.
You can check for existence of the tenant ID in your browser:
On the "Details" page, go to the "Branded login configuration" section.
Click on "Create branded login" icon ![]() .
.
A "Create branded login" overlay opens.
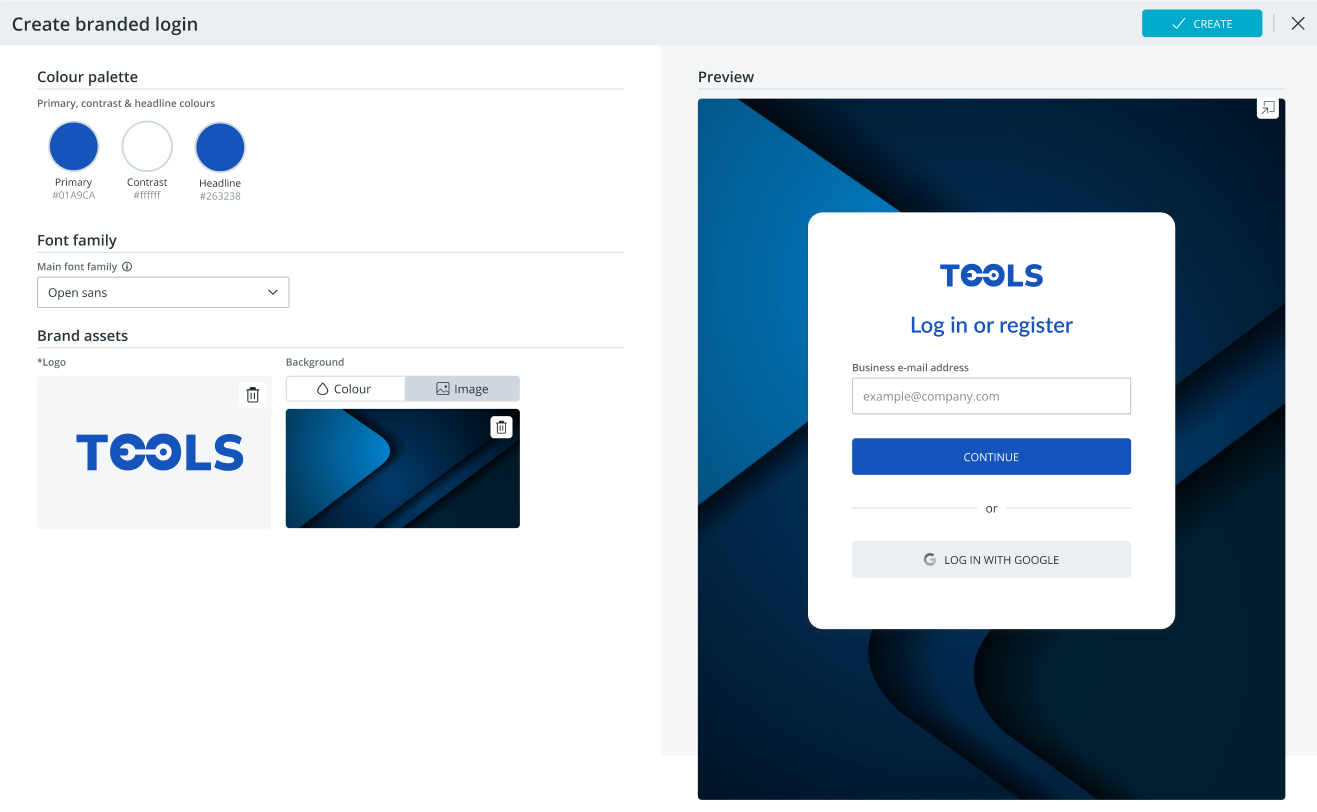
In the overlay, you can configure:
All fields are mandatory and must be filled out.
In the preview on the right side, check your configuration.
Click the ![]() icon to open the
preview to a full page.
icon to open the
preview to a full page.
To finish, click the "Create" button.
The newly created branded login is shown on the "Details" page. There, you can see a small preview of the colour palette and the headline.
Once you have created the branded login, click the global "Save" button on the "Details" page to apply it to all login screens.
Primary colour
Changes the colour of the primary button.
The default is a blue-cyan (#01a9ca).
Contrast colour
Changes the colour of the text inside the primary button.
The default is white (#ffffff).
Headline colour
Changes the colour of the main headline.
The default is dark gray-blue (#263238).
Click the drop-down and select a font. The default font is Open Sans, which is applied to all text elements in the login flow.

Logo and a background are two brand assets that can be added to the login flow in the following formats: .jpg, .jpeg, .gif, .png, .svg, .webp.

To add branded assets:
Logo. Click the "Upload" button to start the selection.
Background. The background can be defined by a colour or an image:
Colour. Click the "Colour" tab, then click the colour field to open the colour picker and choose your colour. The default background colour is a pastel blue (#b0bec5).
Image. Click the "Image" tab and click "Upload" to select your image. The recommended resolution for the image is 2560 × 1440 pixels, up to 2 MB file size.
To delete the logo or the background image, click the "Delete"
![]() icon.
icon.
To edit an already created branded login, simply click on the preview on the "Details" page.
An "Edit branded login" overlay opens where you can edit:
To save, click on the "Update" button.
To apply the edited branded login configuration, click the global "Save" button on the "Details" page.
Go to the "Details" page.
Find the branded login preview and click the "Delete"
icon.

The branded login configuration gets deleted.
Click the global "Save" button on the "Details" page to save the change. The design of the login and registration pages will be reverted to the default CELUM design.